Buttermilk & Panko: Secrets to Old-Fashioned Crispy Onion Rings
There's something uniquely satisfying about perfectly crispy
onion rings. They’re a classic for a reason – that sweet, tender onion encased in a golden, crunchy crust offers a textural symphony that rivals even the best fries. While often relegated to restaurant menus, the truth is, creating truly exceptional
onion rings at home is not only achievable but immensely rewarding. Forget soggy imitations or bland, generic versions. We're about to unlock the "old-fashioned" secrets to making glorious, restaurant-quality
onion rings right in your own kitchen, focusing on the transformative power of a buttermilk batter combined with the unparalleled crispness of panko breadcrumbs. Get ready to elevate your snack game, impress your guests, and discover a homemade treat that will have everyone reaching for more.
The Unbeatable Combination: Buttermilk and Panko
The journey to superior
onion rings begins with understanding the magic behind our star ingredients: buttermilk and panko. This isn't just another batter; it's a carefully crafted approach that yields a distinct and irresistible texture, setting it apart from typical beer-battered or plain flour-coated rings.
Buttermilk, the unsung hero, plays a dual role in this recipe. First, its mild acidity acts as a natural tenderizer for the onion slices, gently softening them while enhancing their inherent sweetness. This pre-treatment ensures that each bite of your
onion rings is not just crunchy on the outside, but delightfully tender and flavorful within. Secondly, buttermilk contributes to a thick, creamy batter that adheres beautifully to the onion, creating a substantial foundation for the ultimate crunch. It provides a unique tang and depth of flavor that a simple milk or water-based batter simply cannot replicate.
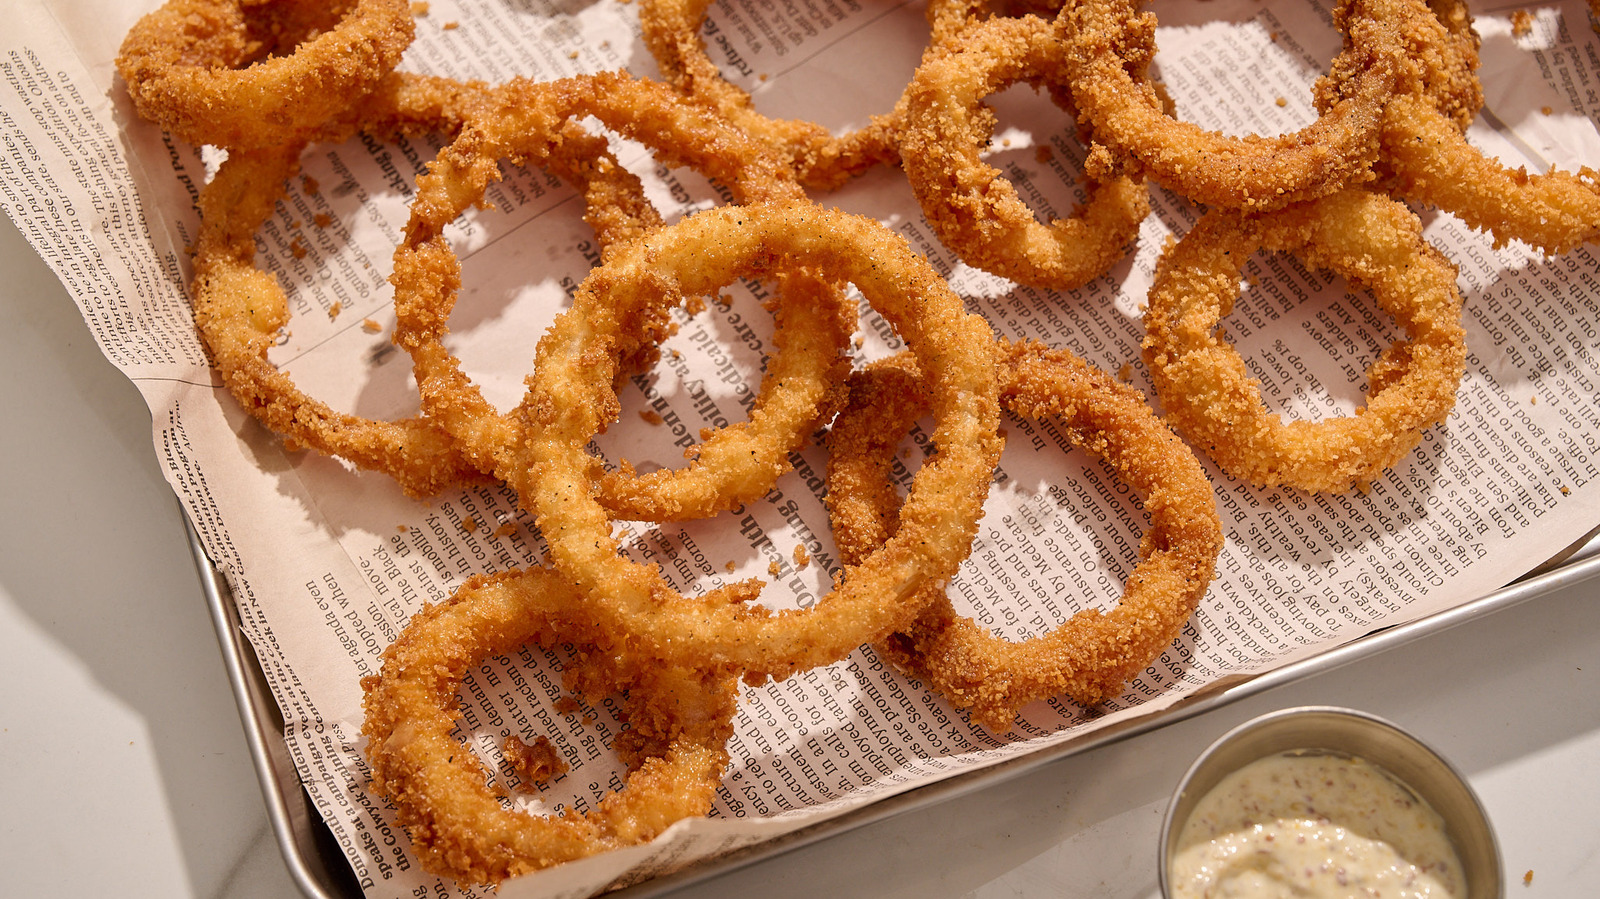
Complementing the buttermilk is panko breadcrumbs. If you've never used panko, prepare for a revelation. Unlike traditional finely ground breadcrumbs, panko boasts a larger, flakier, and airier texture. When fried, these large crumbs absorb less oil and expand, creating an incredibly light, airy, and undeniably crispy crust. This dense, shaggy coating is what gives our "old-fashioned"
onion rings their signature, almost shrapnel-like crunch, a textural experience far superior to the smoother, often doughier crunch of other batters. The combination of buttermilk's tenderizing and flavor-enhancing qualities with panko's unparalleled crispness results in
onion rings that are sweet, savory, tender, and explosively crunchy – a true culinary masterpiece. For a deeper dive into achieving that perfect restaurant taste at home, consider exploring resources like
Master Crispy Onion Rings: Restaurant Taste, Homemade Ease.
Crafting Your Perfect Onion Rings: Ingredients & Preparation
Making these extraordinary
onion rings starts with selecting the right components and preparing them with care. Here's how to lay the groundwork for success:
*
The Star Onion: Not all onions are created equal for
onion rings. Opt for large yellow or sweet onions (like Vidalia or Walla Walla). Their mild, naturally sweet flavor mellows beautifully during frying and won't overpower the delicate batter. You'll typically need just one large onion to yield a generous batch, usually around 30-40 rings. Slice the onion into rings about 1/4 to 1/2 inch thick, ensuring evenness for consistent cooking. Separate the rings gently; thicker ones might need a little extra coaxing.
*
The Buttermilk Batter: This is where the magic truly comes alive. In a bowl, whisk together all-purpose flour, baking powder (which helps create a light, airy texture), salt, an egg (for binding), and of course, the buttermilk. The batter should be thick enough to cling to the onion rings without being overly pasty. Adjust with a tiny splash more buttermilk or flour if needed to reach a pancake-like consistency. Season with a touch of garlic powder and black pepper for an extra layer of savory depth.
*
The Panko Coating: For the ultimate crunch, we use a combination of plain breadcrumbs and panko. While panko provides the primary crispness, mixing in some plain breadcrumbs helps ensure a thorough, even coating, filling any smaller gaps. Place this breadcrumb mixture in a shallow dish, seasoned with a pinch more salt, pepper, and garlic powder.
*
The Dipping Process: A crucial step for maximum adherence and crunch is the dredging sequence. Set up a simple assembly line:
1. First, lightly dredge the separated onion rings in a small bowl of plain flour. This initial coating creates a dry surface for the wet batter to cling to effectively.
2. Next, dip each flour-dusted ring into the buttermilk batter, ensuring it's fully coated. Let any excess drip off briefly.
3. Finally, transfer the battered ring to the panko mixture, pressing gently to ensure the panko adheres generously and completely to all sides. Don't be shy here; more panko means more crunch!
Once coated, place the rings on a wire rack set over a baking sheet. This allows for air circulation and prevents the bottom from getting soggy while you prepare the rest.
Mastering the Fry: Secrets to Golden Perfection
Achieving that perfect golden, crispy crust on your
onion rings hinges almost entirely on one critical factor: oil temperature. This is where many home cooks falter, leading to either greasy, soggy rings or burnt exteriors with undercooked interiors.
*
Oil Temperature is King: The sweet spot for frying
onion rings is consistently between 350-375°F (175-190°C). This range is non-negotiable.
*
Too Cool (below 350°F): If the oil isn't hot enough, the batter and onion will absorb too much oil, resulting in a heavy, greasy, and inevitably soggy ring. It won't get adequately crispy.
*
Too Hot (above 375°F): Conversely, if the oil is too hot, the exterior batter will burn rapidly before the onion inside has a chance to cook through or before the panko can achieve its ideal golden crispness.
*
The Thermometer is Your Best Friend: Invest in a good deep-fry thermometer and monitor the oil temperature meticulously throughout the entire frying process. Adjust your heat source as needed to maintain that ideal range.
*
Batch Frying is Essential: Never overcrowd your pan. Frying too many
onion rings at once will drastically drop the oil temperature, leading back to the soggy ring problem. Fry in small batches, typically 3-5 rings at a time, depending on the size of your pot. This ensures the oil temperature remains stable and each ring has enough space to cook evenly and turn gorgeously golden brown, usually taking about 2-4 minutes per batch.
*
Choose the Right Oil: Canola, vegetable, or peanut oil are excellent choices for deep frying due to their high smoke points and neutral flavor.
*
Drain for Crispness: Once your
onion rings are beautifully golden and crispy, carefully remove them with a slotted spoon or spider and transfer them to a wire rack lined with paper towels underneath. This allows any excess oil to drain away and prevents the bottom of the rings from steaming and softening. Season immediately with a sprinkle of salt while they're hot. For even more detailed guidance on achieving perfect crispness, check out
The Ultimate Guide to Perfectly Crispy Homemade Onion Rings.
Beyond the Fryer: Serving Suggestions & Versatility
The beauty of homemade
onion rings extends far beyond their delicious preparation. These crispy, savory, and subtly sweet delights are incredibly versatile, making them a welcome addition to almost any meal or gathering.
Of course, the classic pairing with hamburgers is undeniable. Imagine sinking your teeth into a juicy burger, complemented by the satisfying crunch of a homemade
onion ring. They're also magnificent alongside slow cooker pulled pork sandwiches, grilled chicken, or any BBQ spread, offering a textural contrast that elevates the entire plate. Don't limit them to main courses, though! These
onion rings make a fantastic appetizer for game day gatherings, parties, or simply a fun snack to munch on while watching your favorite show. Serve them with a side of classic ketchup, a tangy BBQ sauce, a creamy ranch, or even a spicy aioli for dipping – though truth be told, they're so flavorful, they barely need a sauce at all.
Beyond the obvious, consider them as a gourmet topping for salads, adding a delightful crunch and savory element. They can even stand in for French fries in many scenarios, offering a slightly sweeter and more sophisticated alternative. And for those looking for a slightly lighter touch, while the traditional method yields unparalleled crispness, remember that homemade
onion rings can also be adapted for the air fryer. While the texture won't be identical to deep-fried, an air fryer offers a convenient and healthier alternative that's still quite delicious. No matter how you choose to enjoy them, these buttermilk and panko
onion rings are sure to become a family favorite, even winning over those who claim not to like onions!
In conclusion, mastering the art of homemade crispy
onion rings is a culinary journey well worth taking. By embracing the unique properties of buttermilk and panko, meticulously controlling your oil temperature, and paying attention to the simple preparation steps, you can achieve a level of crispy perfection that far surpasses any restaurant offering. These golden, crunchy, sweet, and utterly addictive treats are more than just a side dish; they’re a testament to the joy of homemade food, capable of transforming a simple meal into a memorable feast or turning an ordinary snack into an extraordinary indulgence. So, grab your onions, prepare your batter, and get ready to experience the true secret to old-fashioned, irresistibly crispy
onion rings.